Omnibus Web - EN
- Omnibus
- Get started
- Omnibus Intro
- Station Manager
- Map view
- Media Upload
- Video specifications
- Playlist published
- Playlist
- Net Configuration
- The Playlist
- Power Saving
- The Campaigns
- Brightness
- Rooms
Omnibus
Get started
Omnibus Intro
Macropix “Omnibus” is a digital signage software platform designed to play video files and images, fully meeting the requirements of any LED installation.
It is versatile, intuitive, and continuously evolving thanks to the commitment of the Macropix software engineering team. Omnibus is suitable for all types of LED and LCD digital signage applications.
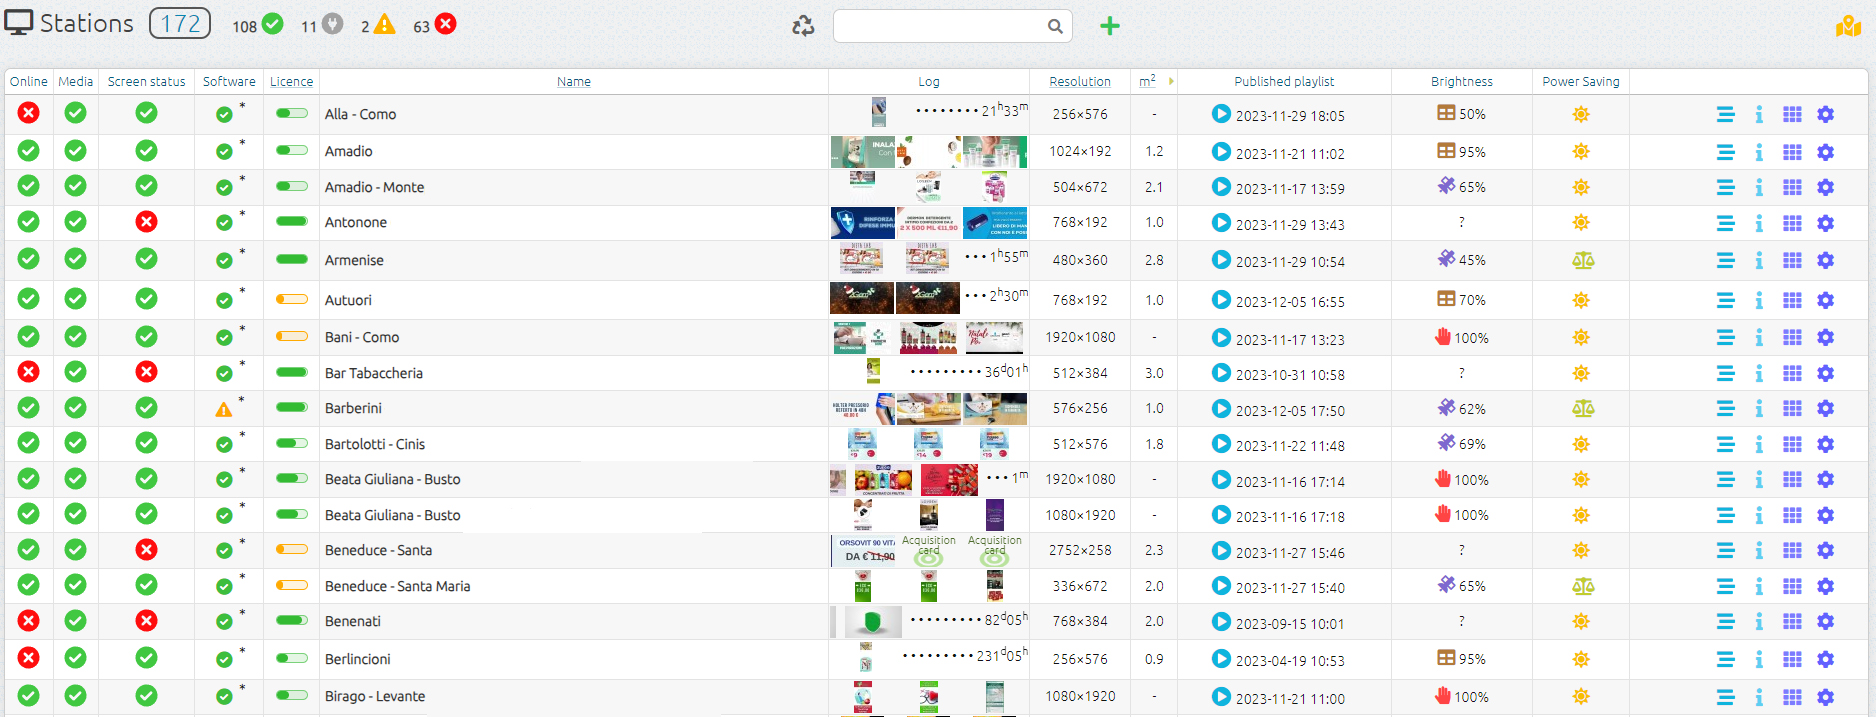
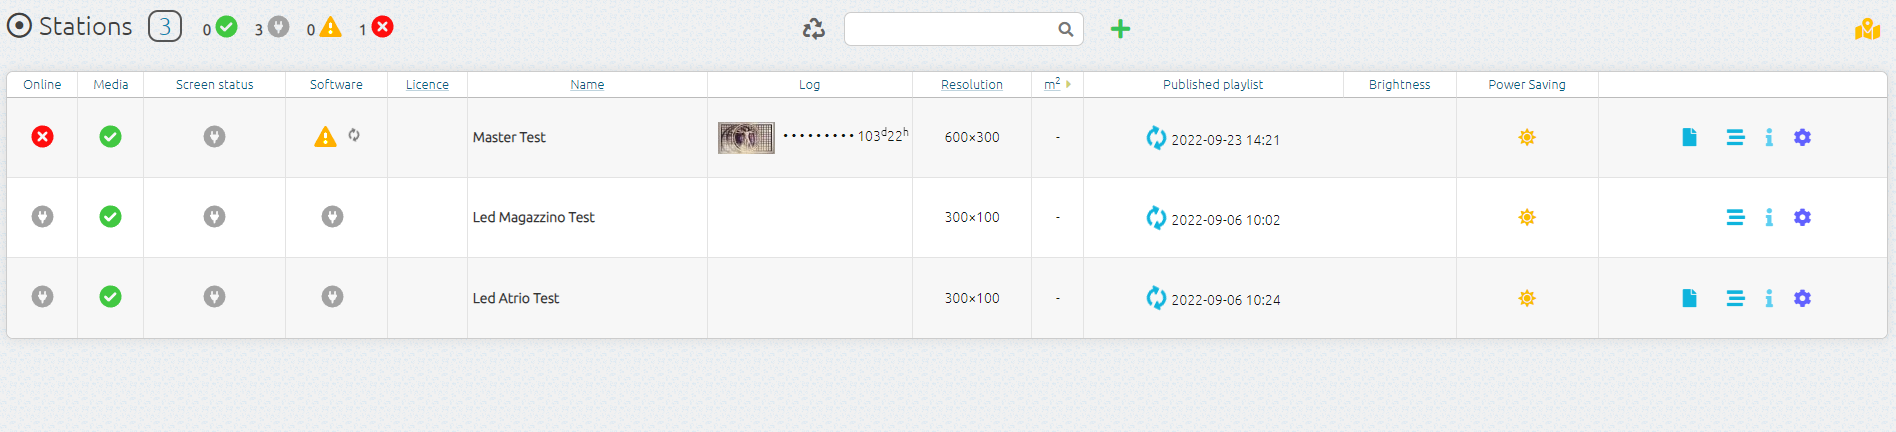
From the Home page, you can monitor the status of every online station (player), update their content and scheduling, and access additional information such as log files, screenshots, system specifications, operating system details, brightness levels, and more.
Station Manager
Online: shows the current status of the station, indicating whether it is connected or not connected to the server.
Media: reports any errors related to the published content.
Screen: reports any errors detected on the LED screen.
Name: the name assigned to the station.
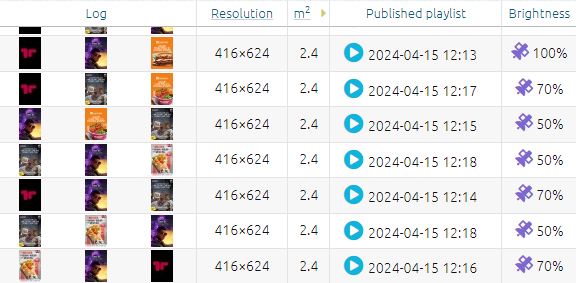
Log: displays screenshots of the videos currently playing in the playlist.
Resolution: the resolution of the LED screen.
Playlist Published: the playlist currently running on the station.
Brightness: the mode and current brightness level of the LED wall.
Info: includes drafts, station playlist, general information, and system information.
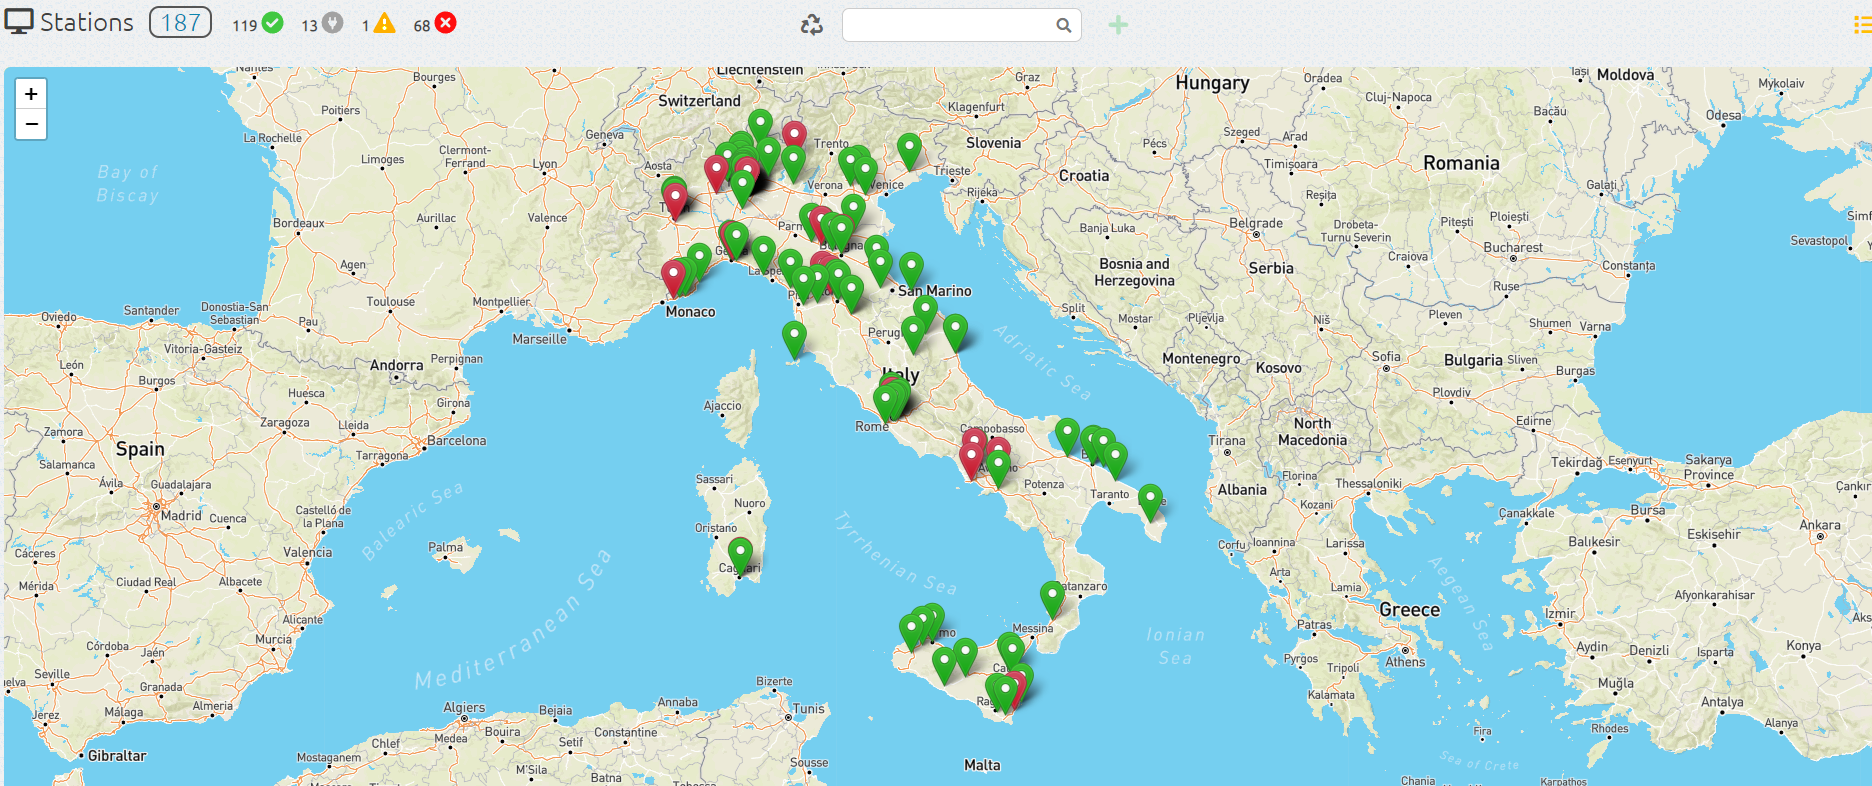
Map view

By clicking on the image ![]() you can view your stations on a map, provided that the longitude and latitude have been entered in the general information of each station.
you can view your stations on a map, provided that the longitude and latitude have been entered in the general information of each station.
Media Upload

To upload one or more pieces of content, simply go to the Media page.
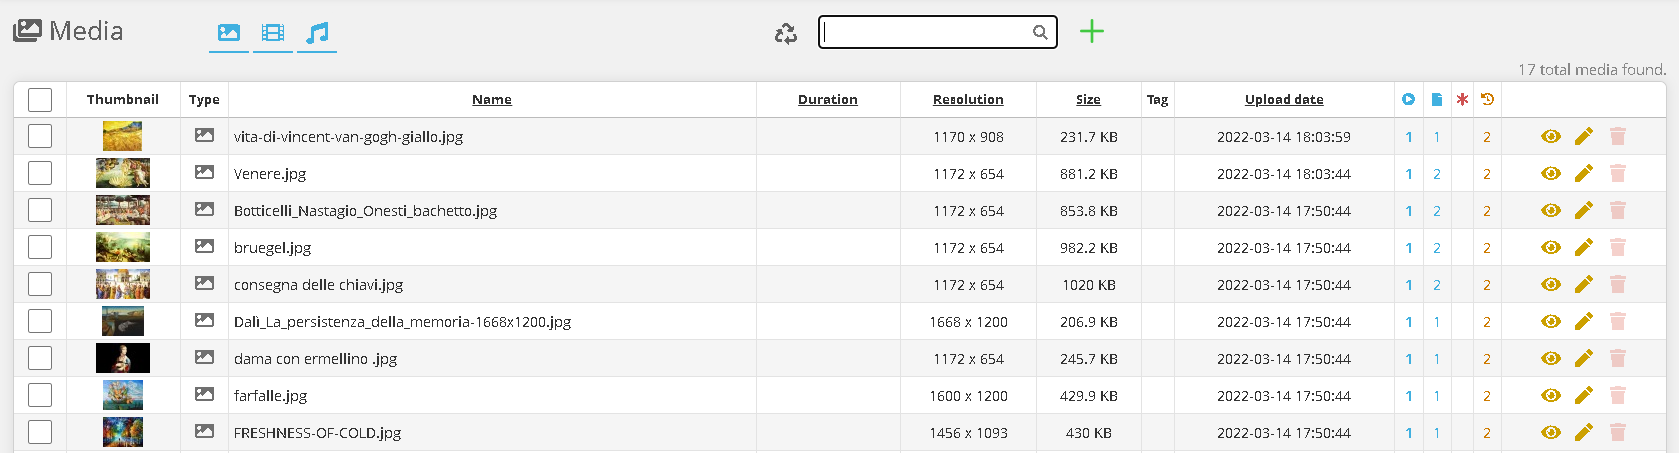
Click on the image ![]()

Then click “Choose File” and select the media you want to upload, and wait for the upload to complete.
The main formats are supported: .mp4, .mov, .jpg, .png, .mp3.

It is also possible to create a web address element, which can then be inserted into the playlist.

You can also create an HTML Code element, which can then be inserted into the playlist.
Video specifications

For optimal and safe operation of Macropix “Omnibus”, we recommend the following video specifications (for resolutions up to 1920×1080 when using Omnibus-100 / 200 /300E) and higher when using Omnibus-400:
-
Format: .mp4
-
Codec: H.264
-
Maximum Bitrate: 12,000 Kbps
Playlist published

In the Published Playlist column, by clicking on the image ![]() you can access the published playlist — the one currently being played by the station.
you can access the published playlist — the one currently being played by the station.
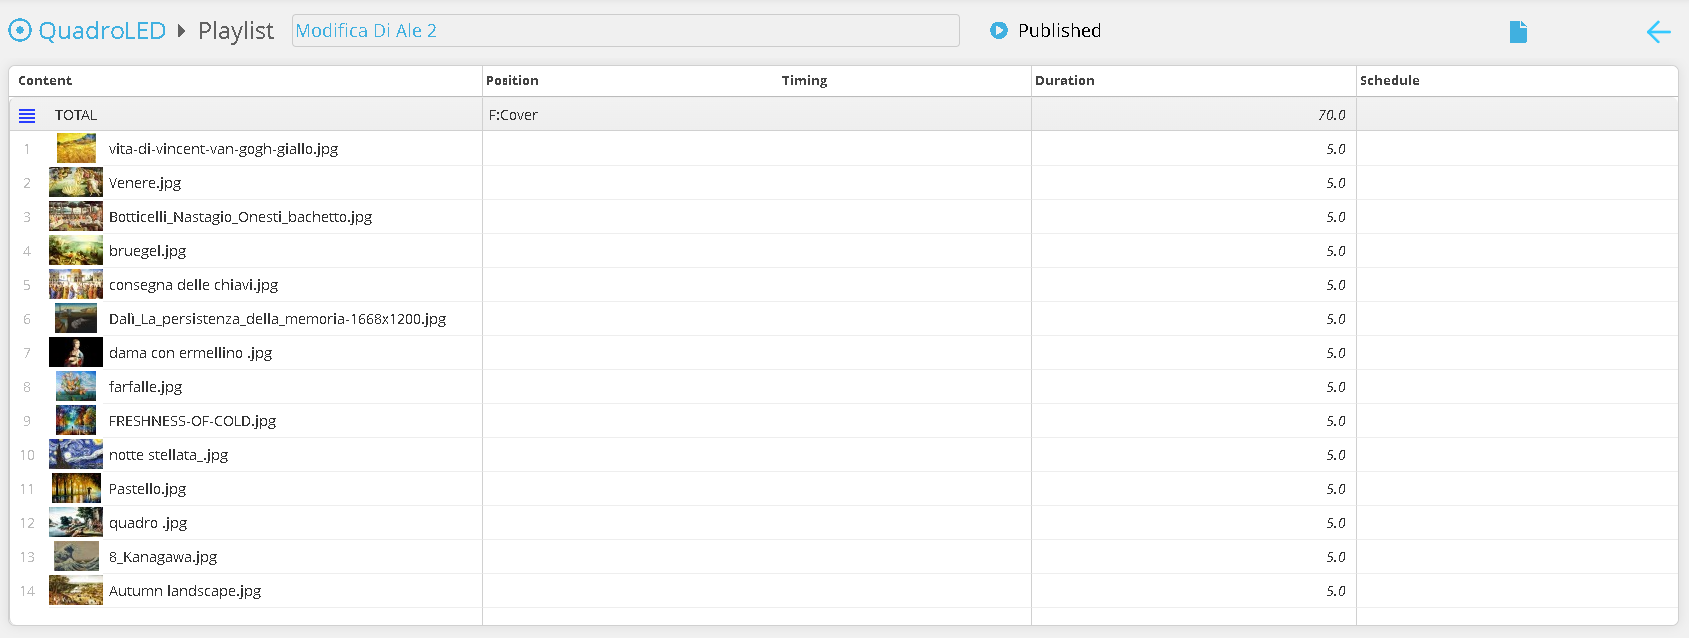
On this page, you can view the media currently playing on the station.
Playlist

By clicking on the playlist icon, you will enter the Playlist page.

On this page, you can create a new playlist using ![]() or edit an existing draft by clicking
or edit an existing draft by clicking ![]()

Click the “Add Media” button and select the media you want to include in the playlist.
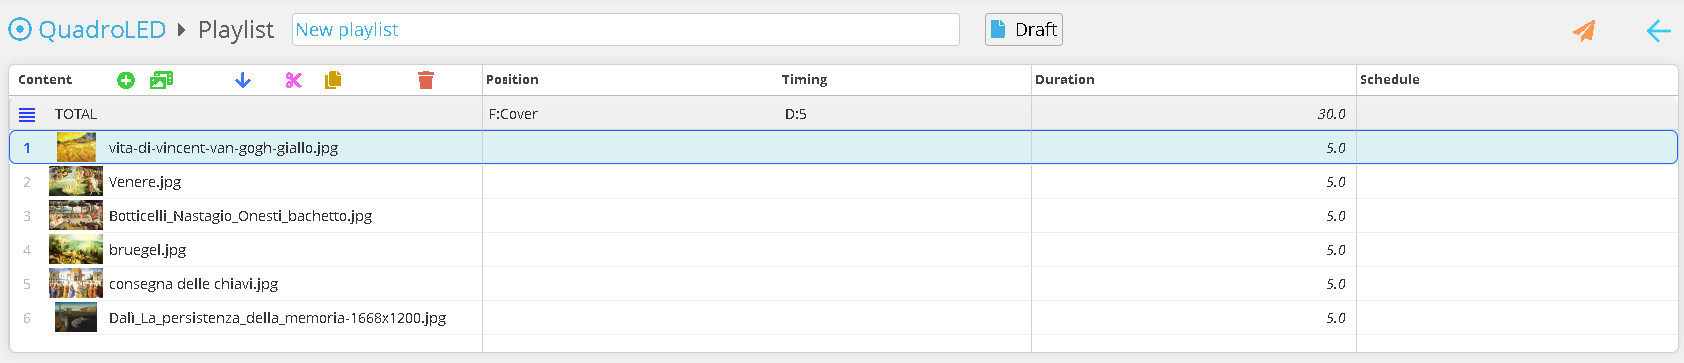
You can now reorder the contents, duplicate them, or delete them. Once all changes have been completed, you can publish the playlist to the station using ![]()
Net Configuration

IP 173.249.23.109
Port 443 and 80
The Playlist
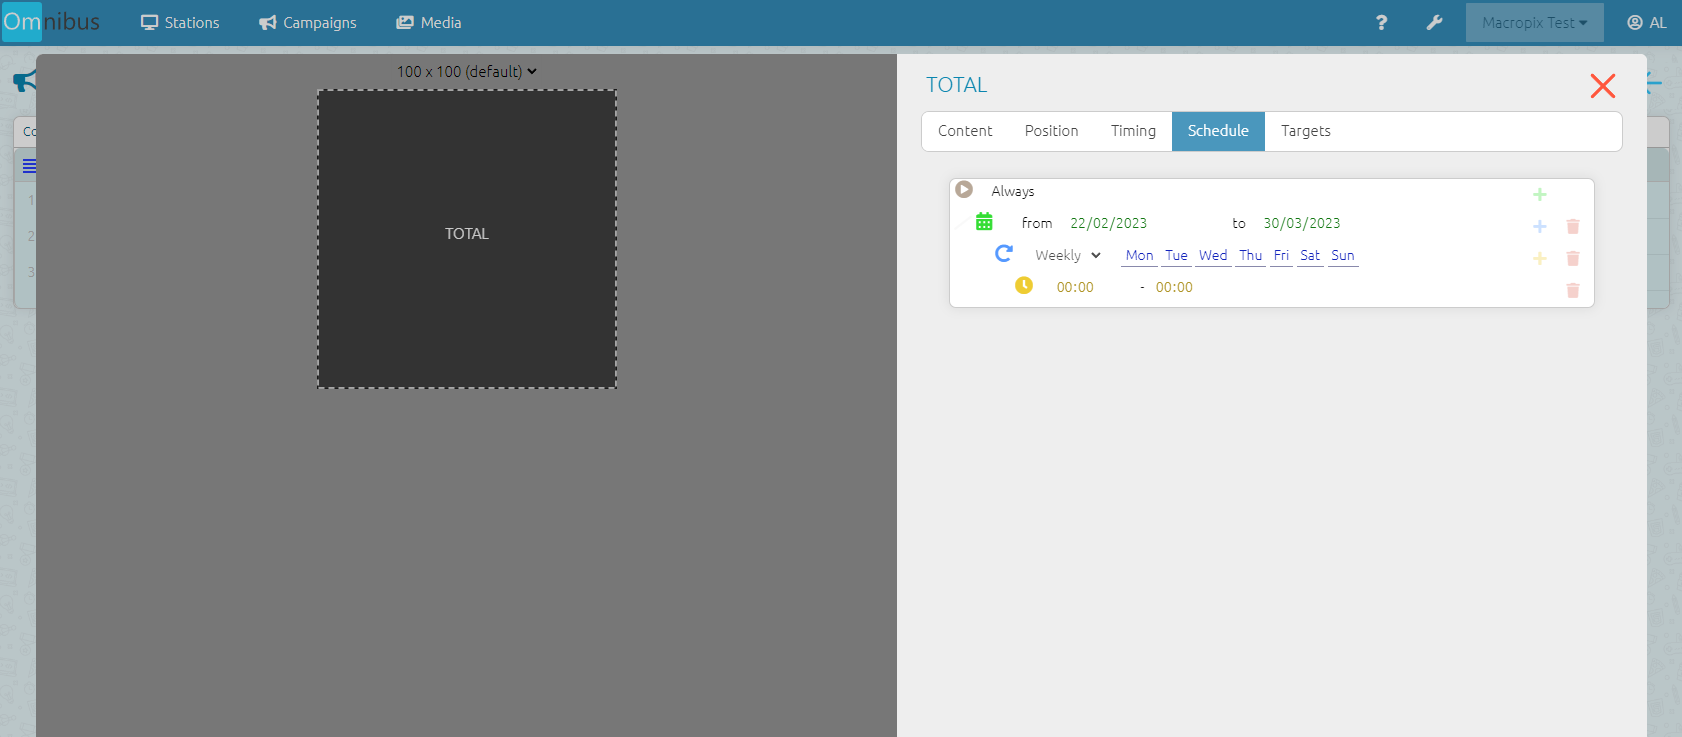
Schedule

For each media item, it is possible to set a dedicated schedule by accessing the menu with a double-click on the Scheduling column of that media.
You can also set a general schedule by selecting TOTAL.
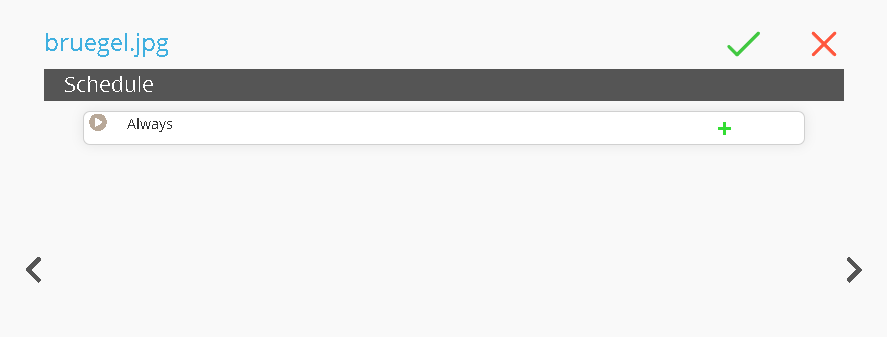
Once the page is open, click ![]() buttons to add a sub-level
buttons to add a sub-level
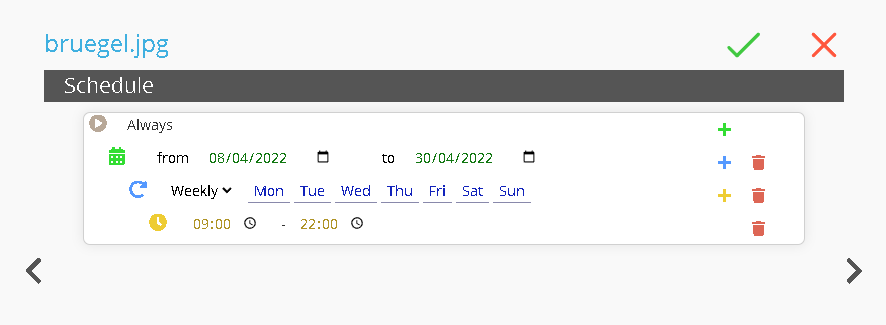
At this point, you can set:
-
Date Range: define the start and end dates.
-
Recurrence: set the weekly recurrence.
-
Time Range: set the daily time range.
This function allows you to schedule content in advance for future events.
For example, you may schedule videos for the opening or closing hours of a shop. In this case, the media file “bruegel.jpg” will be played from 8 April 2022 to 30 April 2022, from Monday to Sunday, between 9:00 AM and 10:00 PM.
Advance Timing
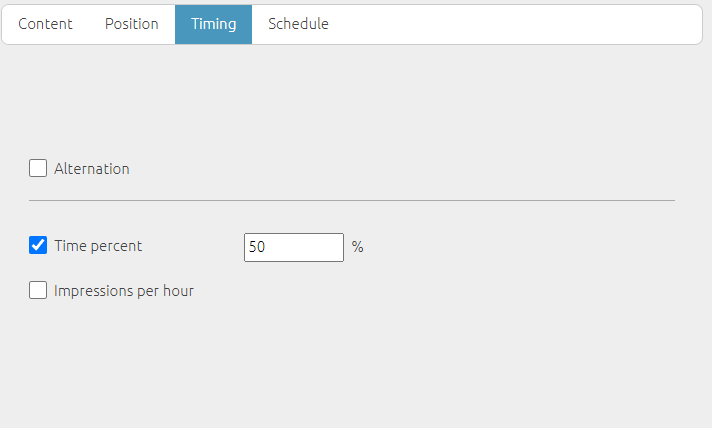
Alternation allows you to alternate the contents.
- The “Times Percent” function enables you to set a percentage of playback time for a specific media item or for a list, layout, folder, or project.
- The “Times per Hour” function, on the other hand, allows you to define how many times per hour a specific content should be played.
Containers
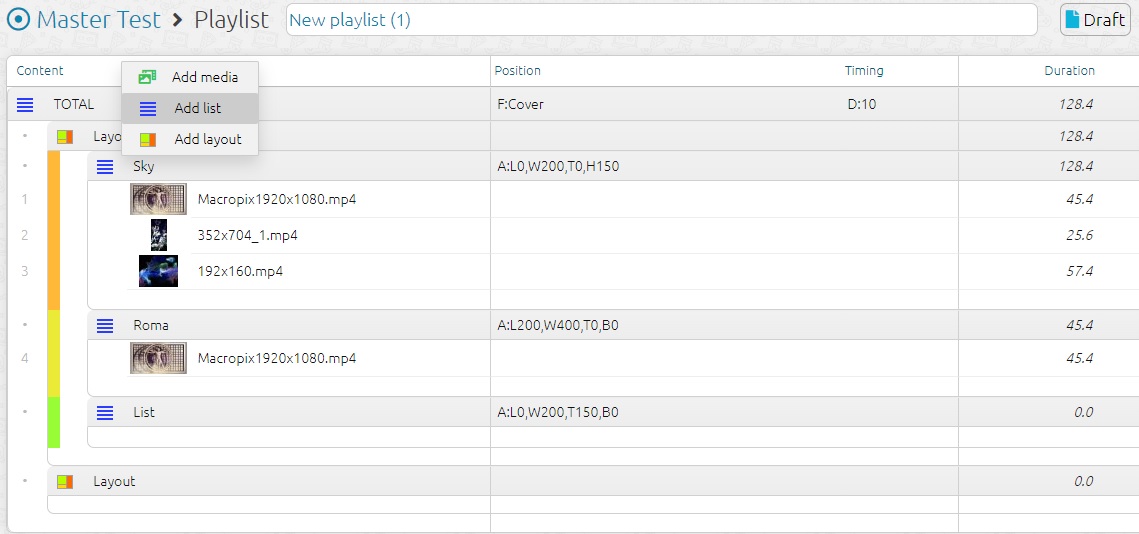
Playlist items can be of two types: media and containers.
Containers
-
Layout: a tool used to divide the video window into different areas.
-
List: allows you to divide the playlist into multiple containers to keep it better organized.
Layout
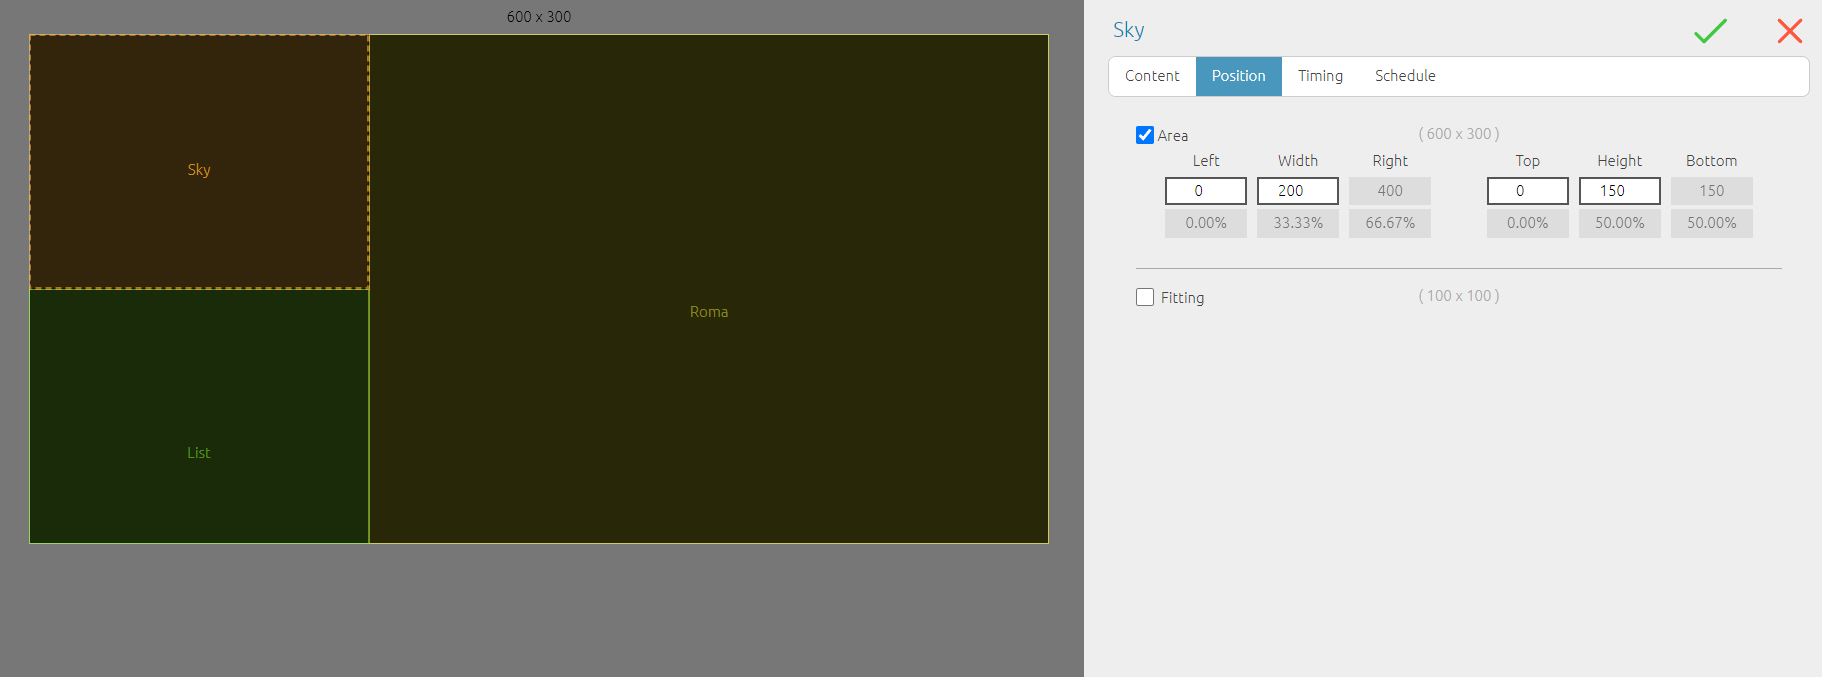
This element allows you to play multiple items in parallel by partitioning the video window.
Once the layout is created, List items must be inserted—one for each partition—while assigning the desired area.
Within each list, the corresponding media contents can then be added. All contents will play simultaneously in synchronization.
Note: the maximum number of partitions depends on the hardware specifications of the PC. A more powerful processor and graphics card will support a higher number of simultaneous processes.
Power Saving
Ekoled
Macropix has developed and patented a proprietary system within its Omnibus digital signage software that allows you to manage and control the energy consumption of an LED display based on the visual content being shown—even down to the individual frames. This feature provides a real-time overview of both economic and environmental savings and can be applied to both outdoor and indoor LED displays.
The software monitors and manages in real time:
-
the physical characteristics of the display (e.g., nominal power consumption)
-
the brightness settings throughout the day, ensuring compliance with local regulations, especially during nighttime
-
power-consumption thresholds, which can be set according to the required maximum load for technical or commercial reasons
-
daylight brightness management, ensuring regulatory compliance while maintaining optimal visibility
-
switch-on and switch-off control of receiving cards
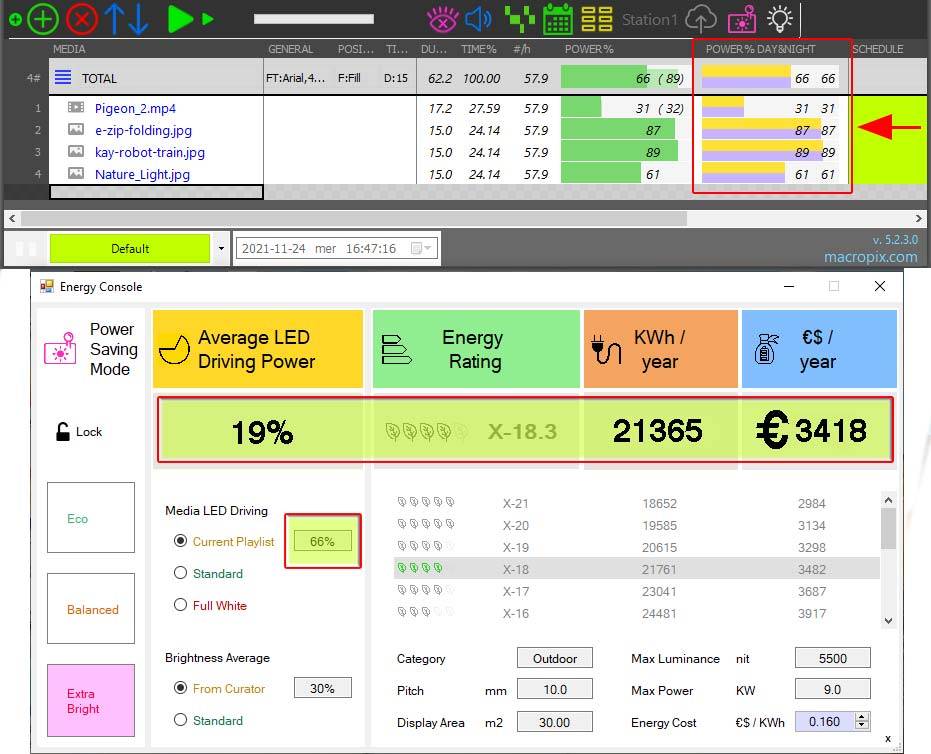
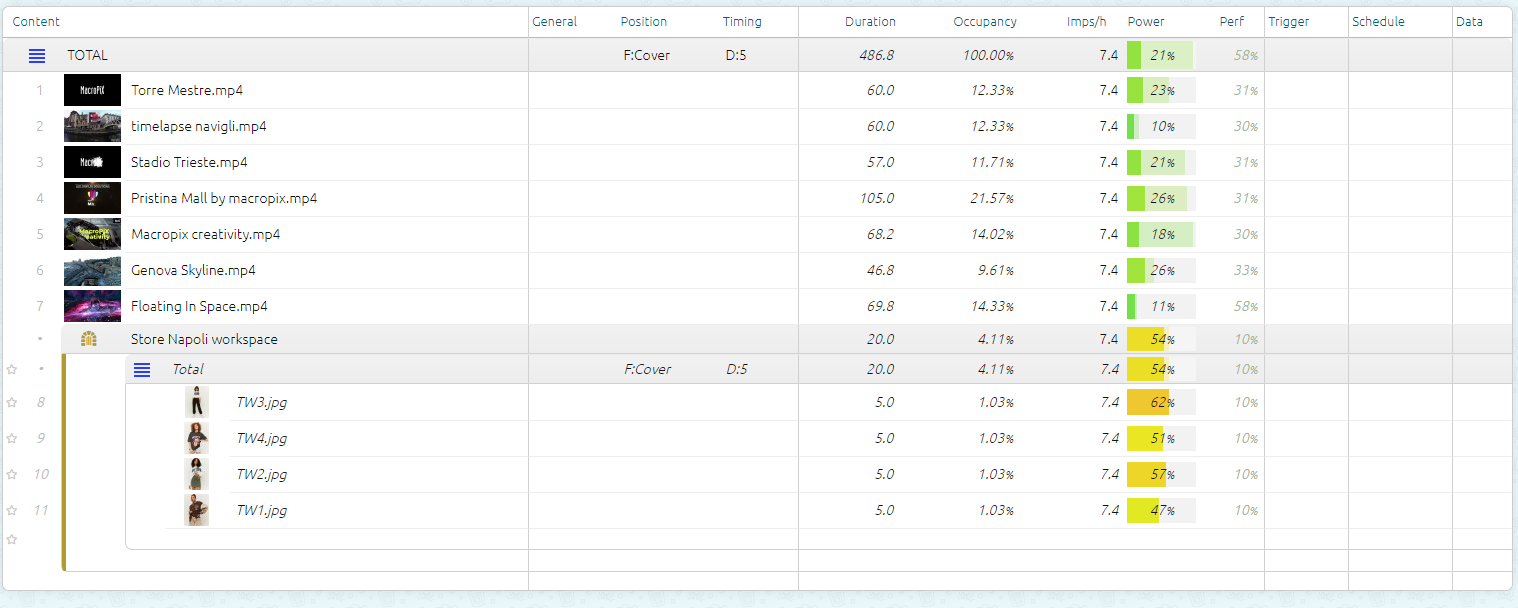
Omnibus analyzes each frame of every video or image in the playlist, calculating an average total power consumption. Each piece of content can also be previewed, allowing creative teams to immediately verify energy-saving performance before publication.
Energy Saving function
In the Power Saving column, you can view the currently selected energy-saving mode.
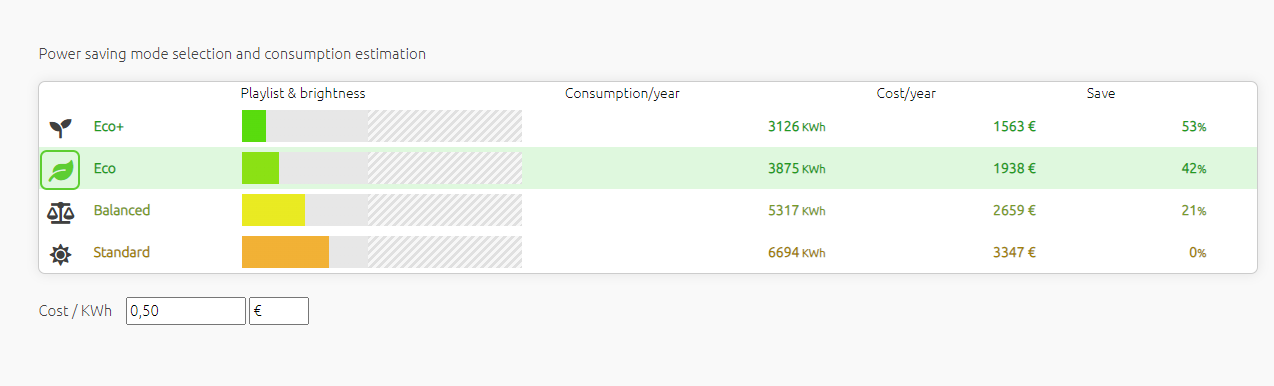
It is possible to select the desired saving mode and set the electricity cost per kWh.
Omnibus will then calculate the operating hours of the LED wall, the brightness table, and the contents loaded in the playlists, allowing you to obtain an estimate of the annual power consumption.
The Campaigns
Introduction
Campaigns make it possible to centrally manage portions of the schedule that are shared across multiple stations. When a campaign is published, it is distributed to all the involved stations by inserting its contents into their respective playlists.
Within each station, one or more advertising spaces can be created for campaigns. Each campaign can then individually decide how and in which advertising spaces its contents should be published.
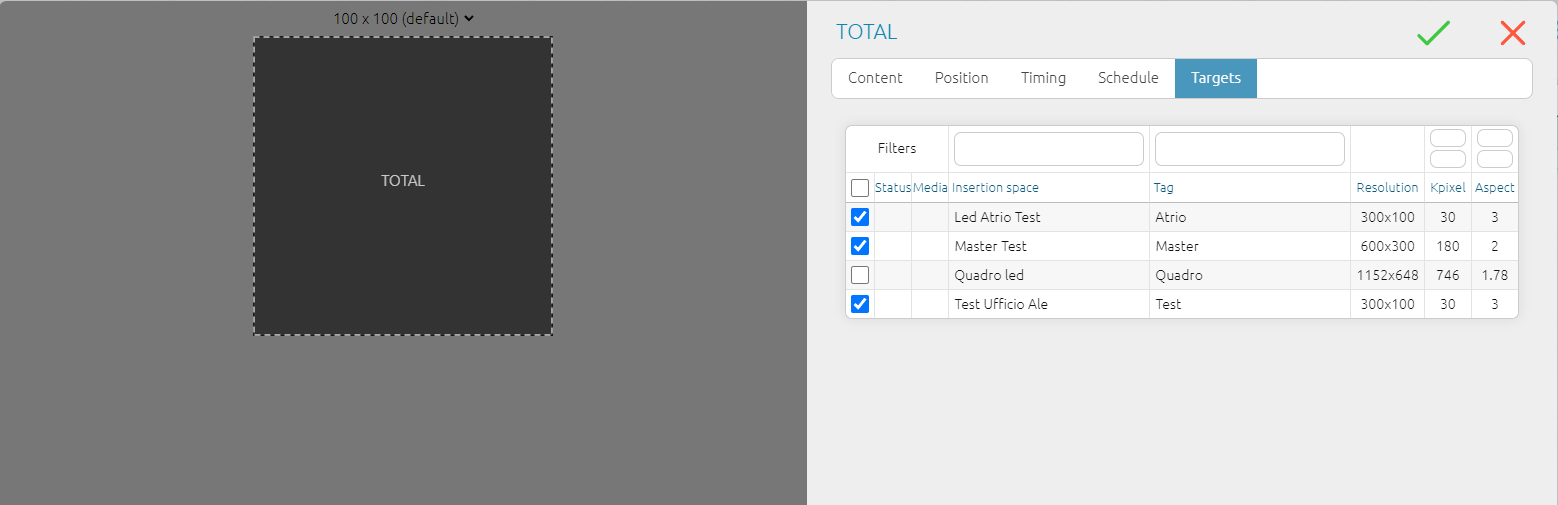
Insertion spaces to be targeted can be identified either through direct selection or through filtering (by name, tag, kpixel, aspect ratio).
Situations where insertion spaces have different sizes and proportions can be easily managed by applying differentiated filtering within the playlist.
A campaign always includes a start date and an end date, although these dates can be changed with each new publication.
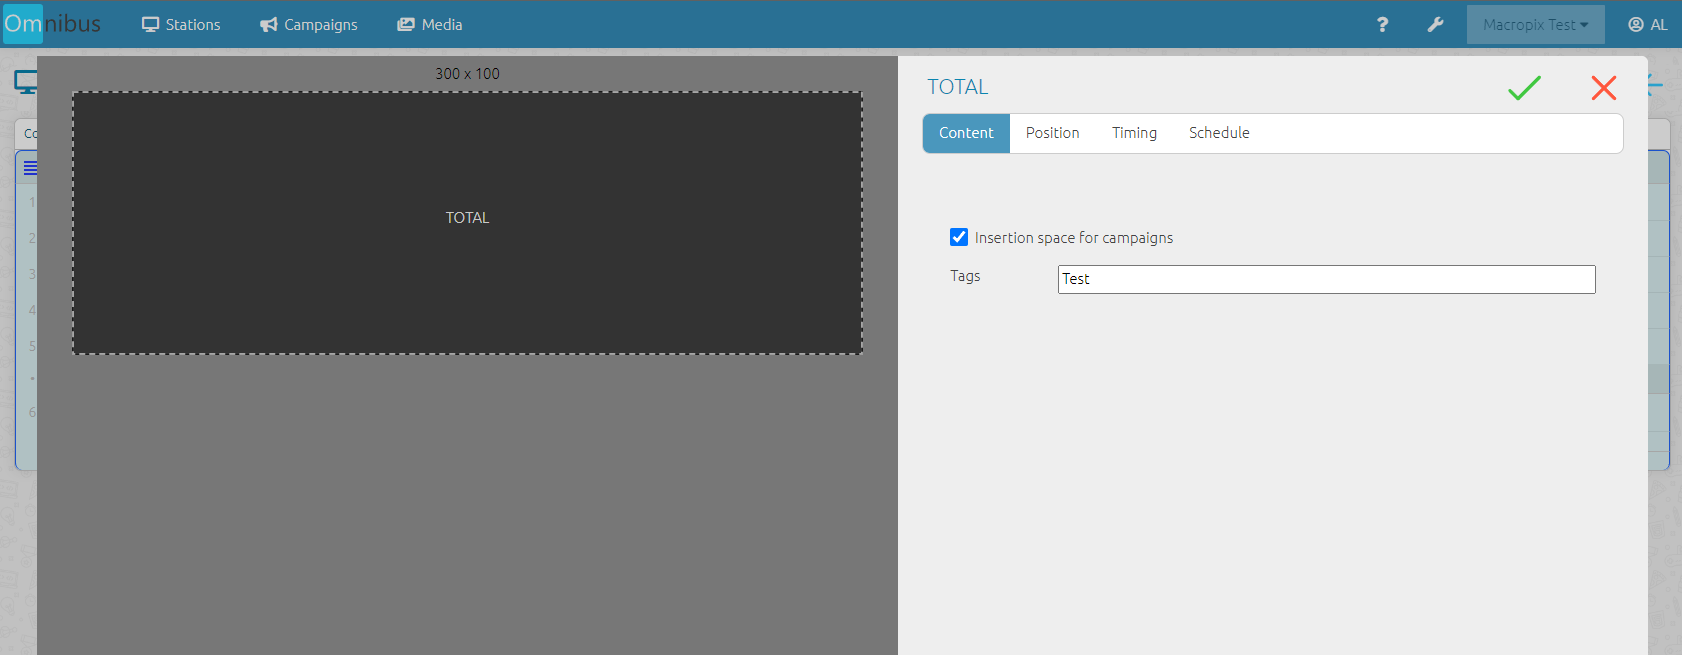
Campaign Creation
As before, the insertion spaces must be created on each station by enabling the corresponding flag, as shown in the image.
This operation can be performed on both “Total” and “List” elements within the playlist.
Then enter the Campaigns menu, click the “+” button, and assign a name and initials.
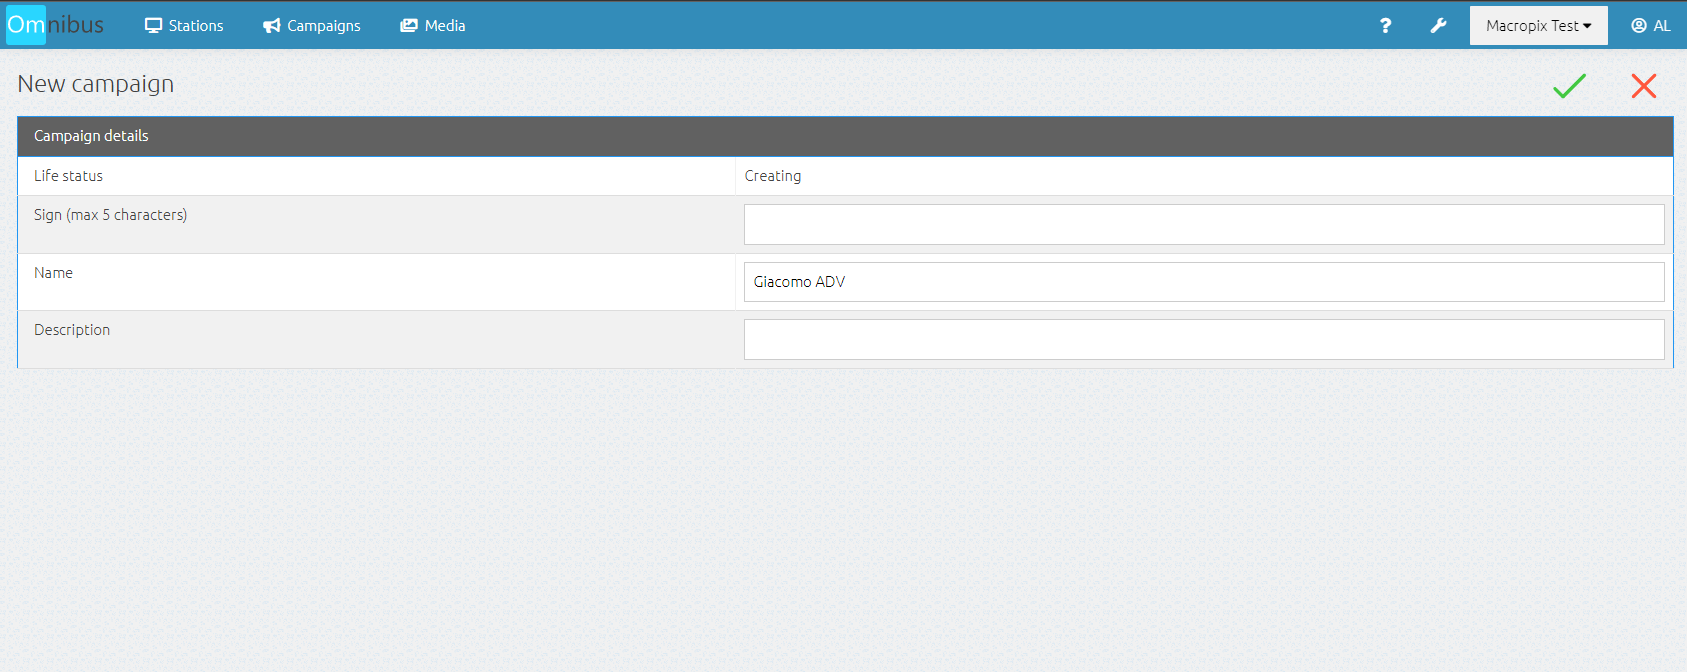
At this point, the campaign has been created and is now ready to be populated with content and published.
Publication
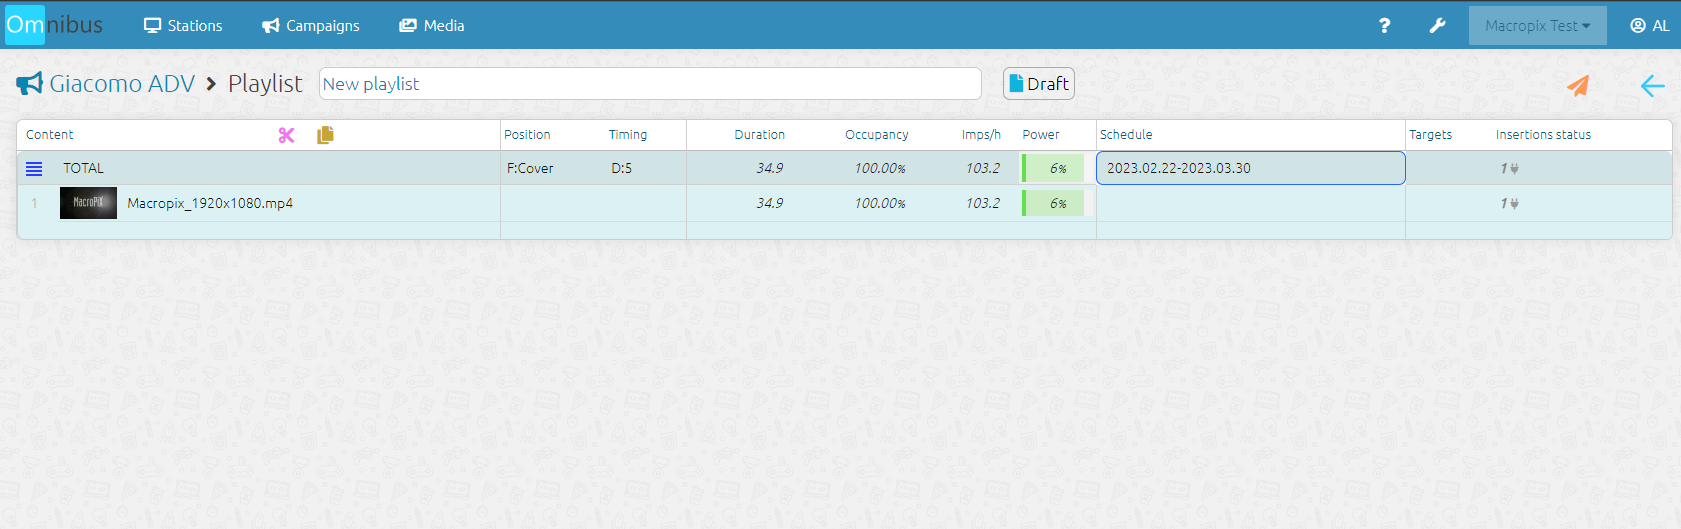
At this point, you need to insert the contents into the campaign playlist.
Now all that remains is to publish the campaign by clicking on the  icon.
icon.
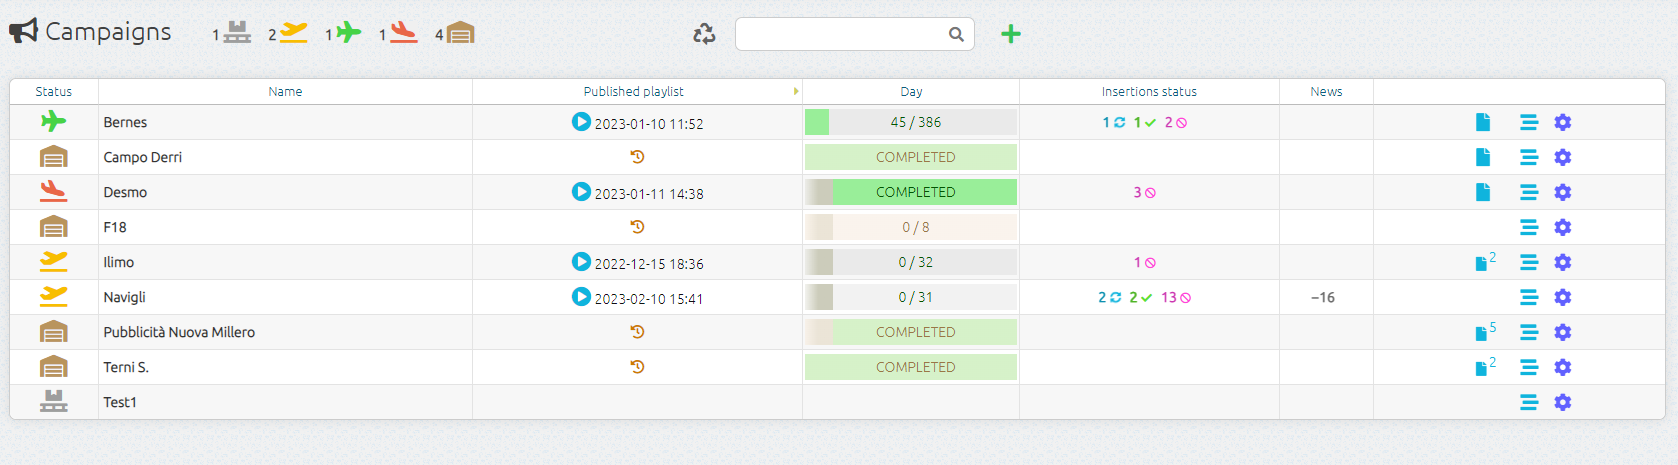
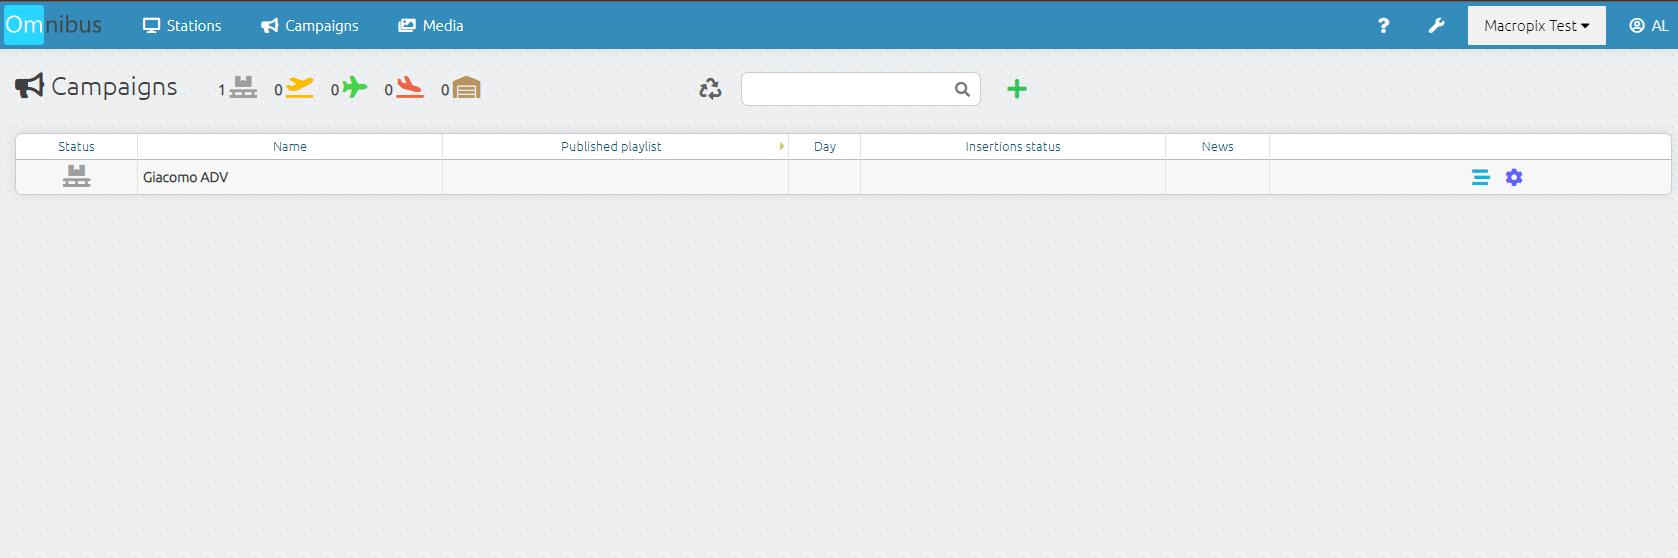
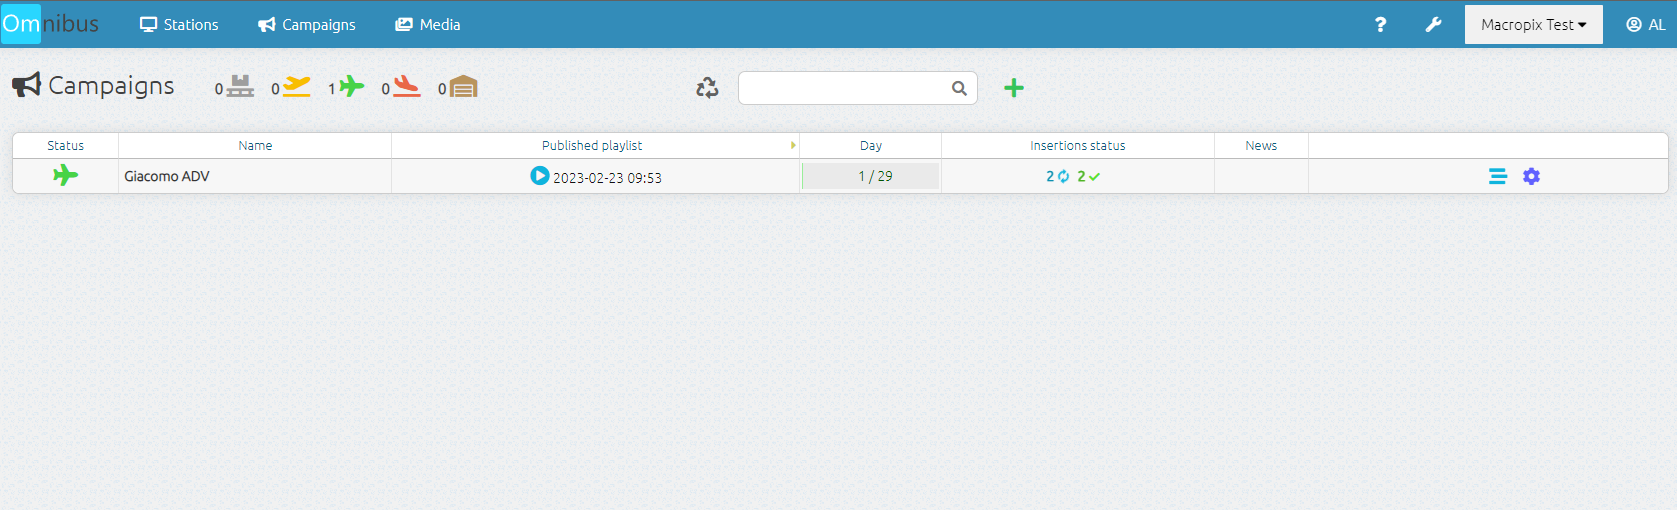
Campaign verification
Once the campaign has been published, you can return to the Campaigns menu to check the publication progress in the Insertions Status column.
By going to the Stations menu, you can verify that the campaign has been correctly distributed, indicated by the pink megaphone icon displayed next to the playlist.

By entering the playlist currently running, you can verify that the campaign has been correctly inserted by the system.

Brightness
Operating mode
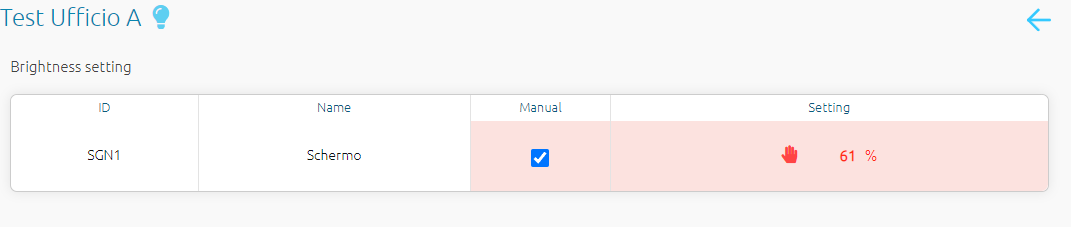
In the Brightness column, you can check the current status of the LED display.
![]()
By clicking on the  icon, you can select the mode used to manage the brightness of the LED display.
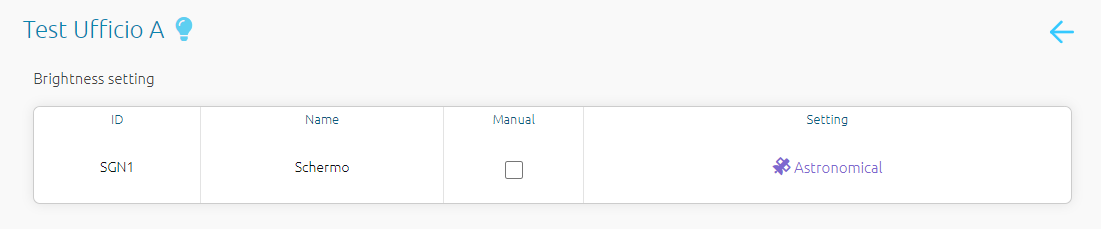
Astronomical uses the annual curve of sunrise and sunset.
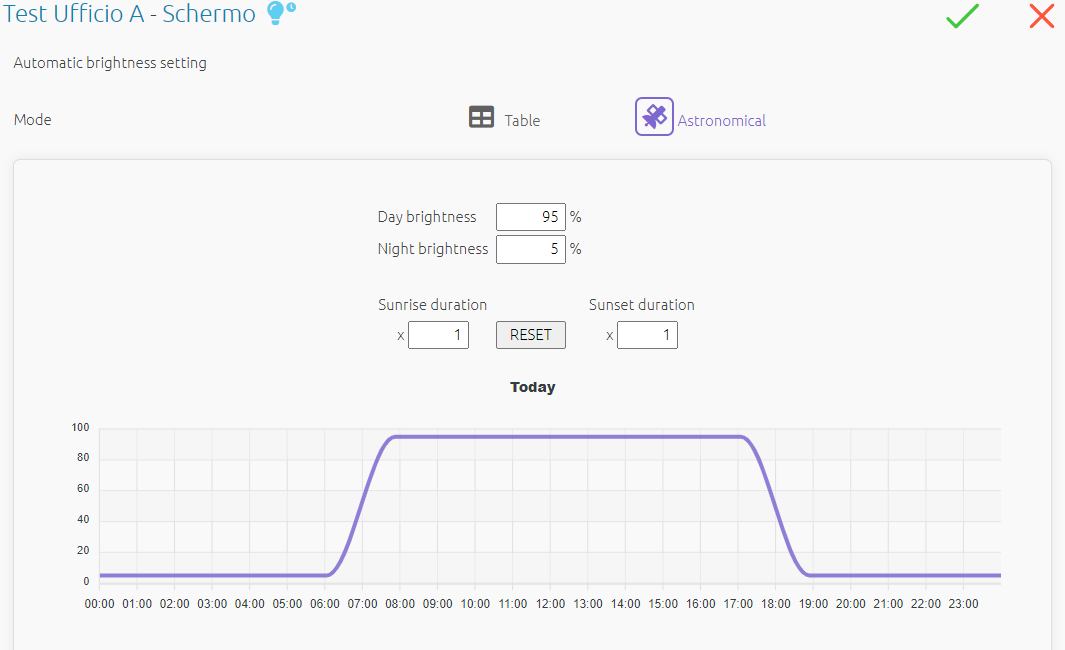
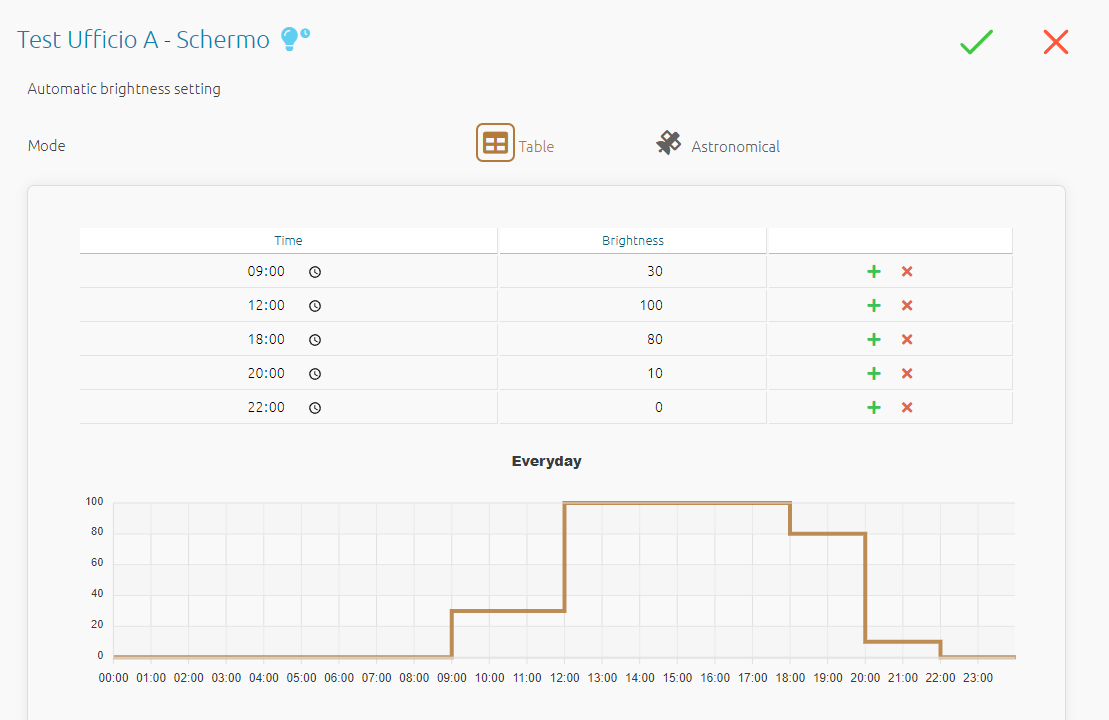
Table: hourly scheduling.
Manual: manual and instant adjustments.
Sensor: automatic control via an environmental sensor; visible and can be activated only if a sensor is installed.

Rooms
Introduction
Rooms are used to share a portion of the playlist to a "guest" user.

Typical case:
An LED display in a store located in another town is managed by the headquarters. However, the store manager needs to manage a portion of the overall playlist to insert special promotions that apply only to that specific store.
This is where the Room function comes into play: it creates a virtual, restricted space in which the store manager can manage only the assigned portion of the playlist.
Headquarters can also apply a number of restrictions to the Room to limit or control its use.
Room creation
To create a new Room click the "+" button.

Set an abbreviation, a name, and, if needed, a description.

It is possible to set limits for the Room, such as:
-
minimum and maximum duration of its playlist
-
minimum and maximum required percentage of playback time
Gestione playlist
The generated Rooms will be displayed in the Rooms menu, showing:
-
the status of the Room (open or closed)
-
its name
-
the applied limits
-
the date of the last publication
-
the publication status: published, publishing, or unpublished
By clicking on the Published Playlist column  the guest user can access and populate their playlist.

To insert the new Room into the destination playlist, click the “Add Room” button  .
.
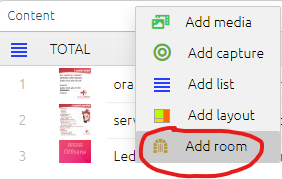
As you can see in the image below, the Room playlist is automatically inserted into the station playlist.
From now on, each time the Room is published, the station’s playlist will be automatically updated.